Create an AI Chatbot
These are simplified docs to help you set up your first AI agent quickly.
On the left, you’ll find more detailed documentation if you'd like to explore further later.
If you haven’t started your free trial yet, click here — the first two weeks are on us.
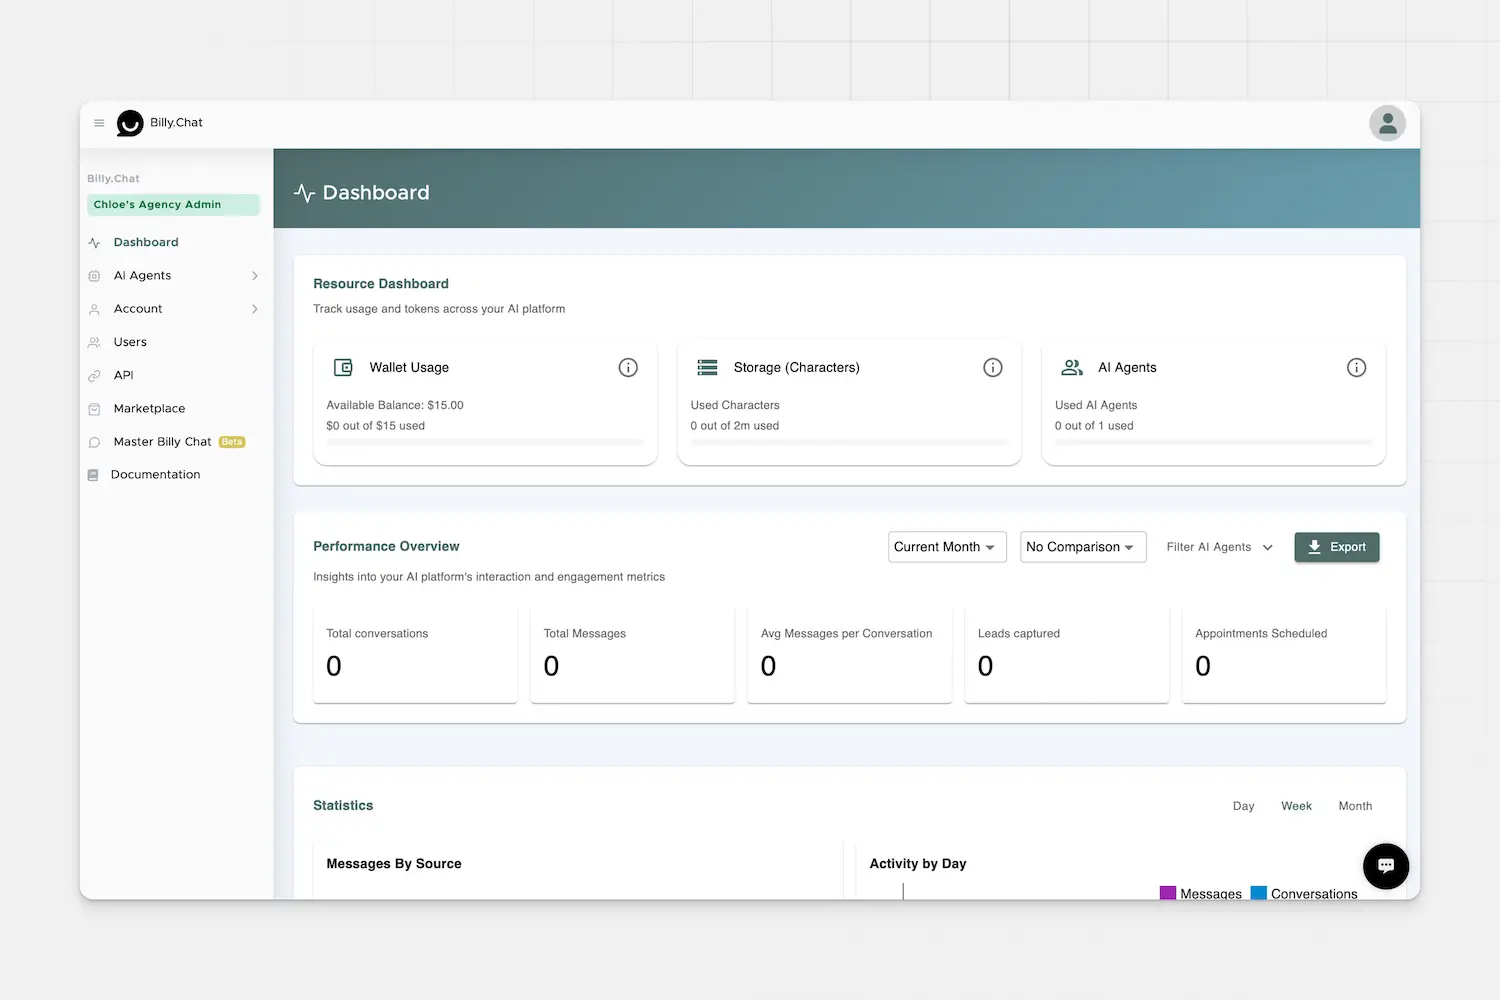
Once your trial is active, your dashboard will look something like this:
Step 1: Create your chatbot
- Navigate to My AI Agents.
- On the right side, click the "New AI Agent" button to create your first chatbot.
Creating a new AI agent
Step 2: Configure your AI Agent
You’ll see a screen like this where you can set up your AI agent’s details.
Fill in the settings to suit your needs — you can always come back and edit them later. Here are the key fields to pay attention to:
- Name & Display Name: Give your agent an internal name and a friendly name users will see.
- Primary Model: Choose the AI model you want it to use (we recommend GPT‑4o for most cases).
- Support Email: Add an email address where your clients can reach you.
- Base System Prompt: Customize how the agent behaves by editing the system prompt.
You can also adjust conversation starter messages, initial popup messages, and toggle features like streaming, audio, and vision.
When you’re happy with your settings, hit "Create AI Agent" at the bottom — and you’re done!
Step 3: Train your chatbot
For this example, we’ll use the website scraper — since in most cases, your client’s website already answers most of their visitors’ questions.
Later, you can refine the chatbot further by adding common questions & answers, uploading files, or tweaking how it responds in specific scenarios.
Training the AI agent on your website data
Here’s how to scrape a website:
- Go to the Websites tab in your dashboard.
- Enter the URL of your client’s website.
- Choose how many pages you want to scrape (e.g., up to 100).
- Leave the recommended options checked (like auto‑scrape daily and extract main content only), unless you have a specific reason to change them.
- Click Scrape Website URLs to start.
Once scraping finishes, go to the Scraped URLs tab.
Here you’ll see a list of all the pages found. Simply select the pages you want to train your AI agent on and hit "Re-Train AI Agent".
You can also review, delete, or re‑crawl any page if needed.
When you’re ready, move on to the next step.
Step 4: Customizing the branding
- Go to the Appearance tab in your dashboard.
- Choose fonts, colors, and text to match your (or your client’s) brand.
- Upload a logo, chat bubble icon, and avatar if you like.
- Add a tagline (optional) and adjust the widget size, shape, and position.
- Click Save when you’re happy with the look.
Quick overview of the branding settings
Step 5: Integrate the chat widget
1 — Go to the Integrations tab in your dashboard.
2 — Click Get Embeddable Code.
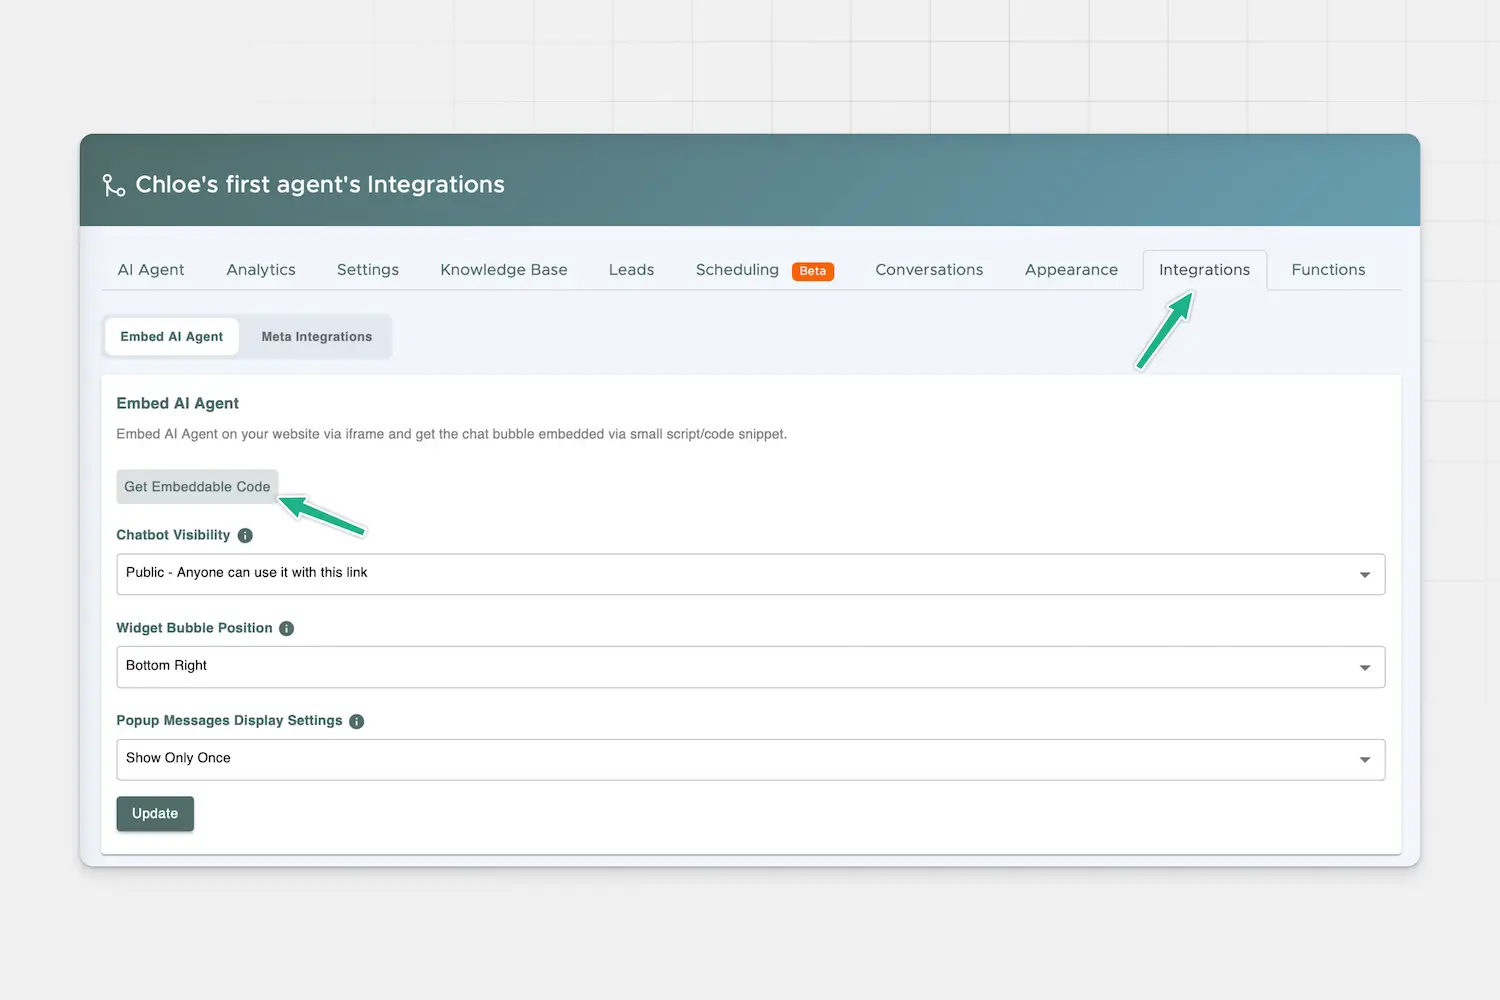
3 — Choose one of the two embed options:
• First code (iframe): embed the chatbot directly into a specific page.
• Second code (script): show a floating chat bubble on all pages.
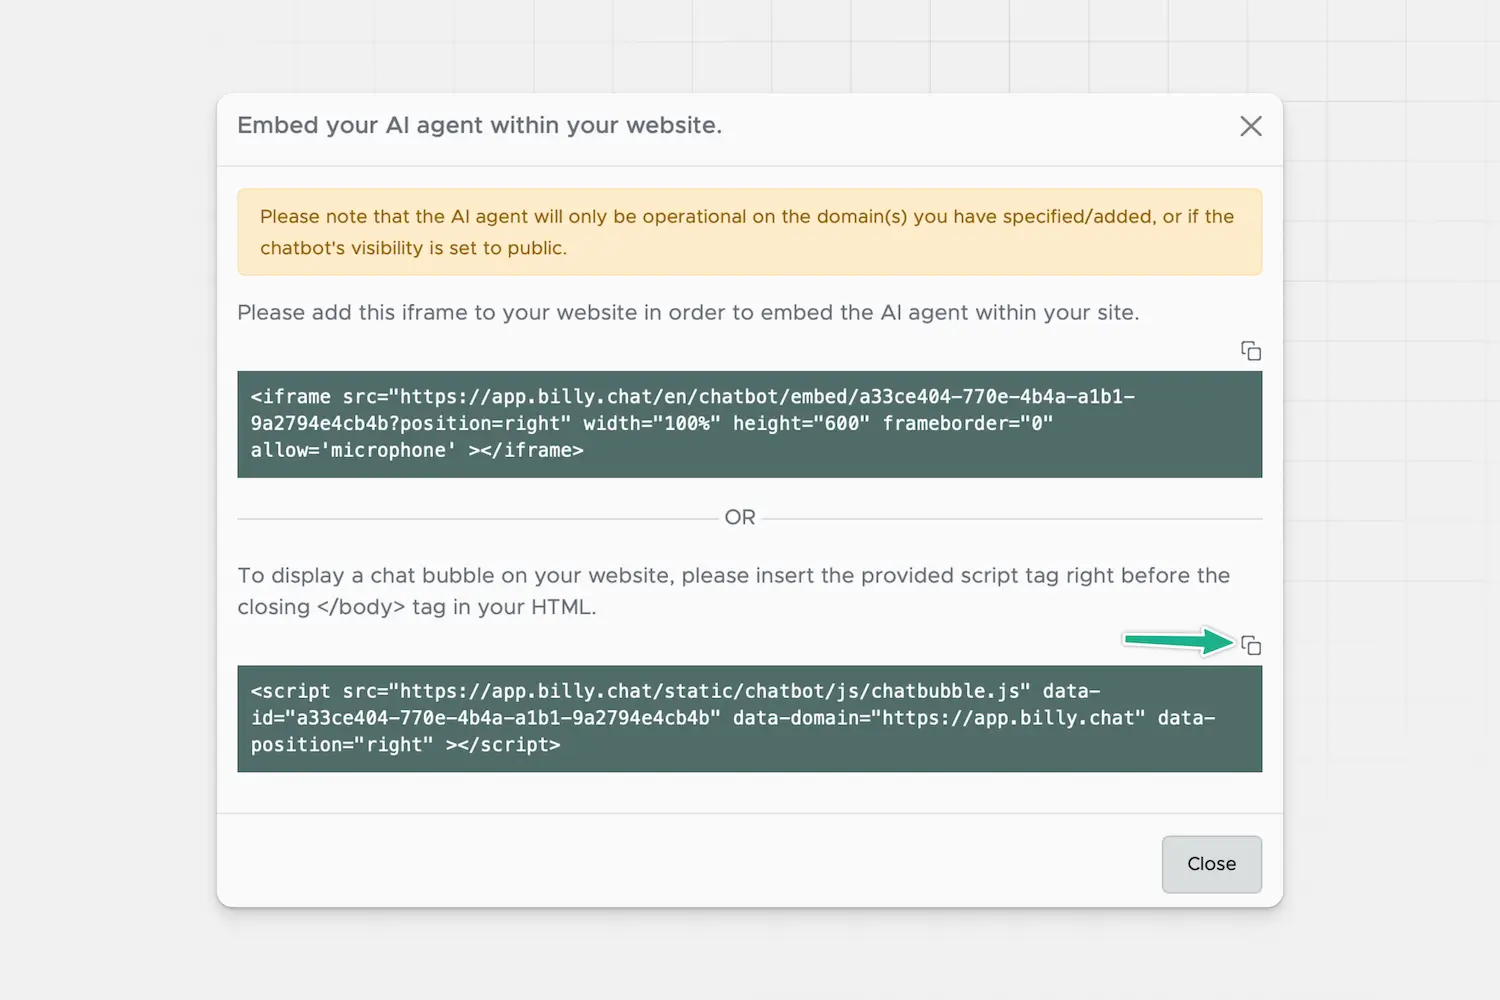
4 — If you’re using the chat bubble, paste the script code just before the closing </body> tag of your website’s HTML.
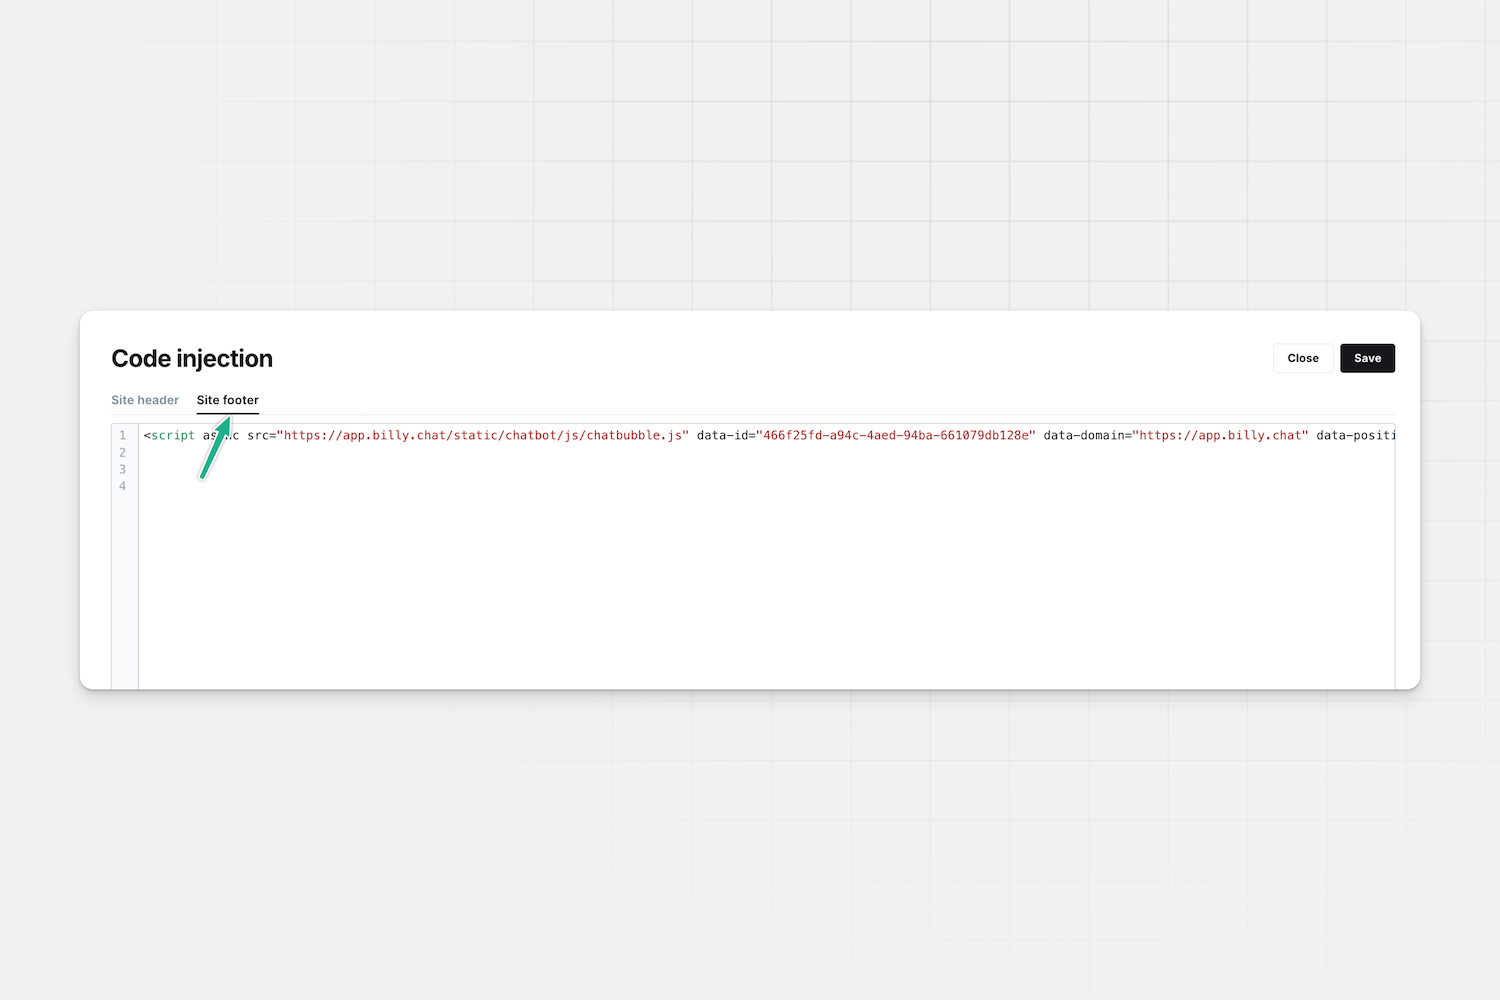
async to the <script> tag to make your site load faster.5 — Save and refresh your website — the chat bubble should now appear and your AI agent is live.
What’s Next?
Congratulations — your first AI agent is live and answering questions on your (or your client’s) website.
This was just the simple getting‑started guide — there’s a lot more you can do. Explore the detailed documentation on the left to learn how to customize your agent even further, add advanced features, and make it truly yours.
If you ever get stuck or prefer personal help, you can always reach out:
• Open the chat in the bottom‑right corner of your dashboard — Billy is there to guide you.
• Or email us anytime